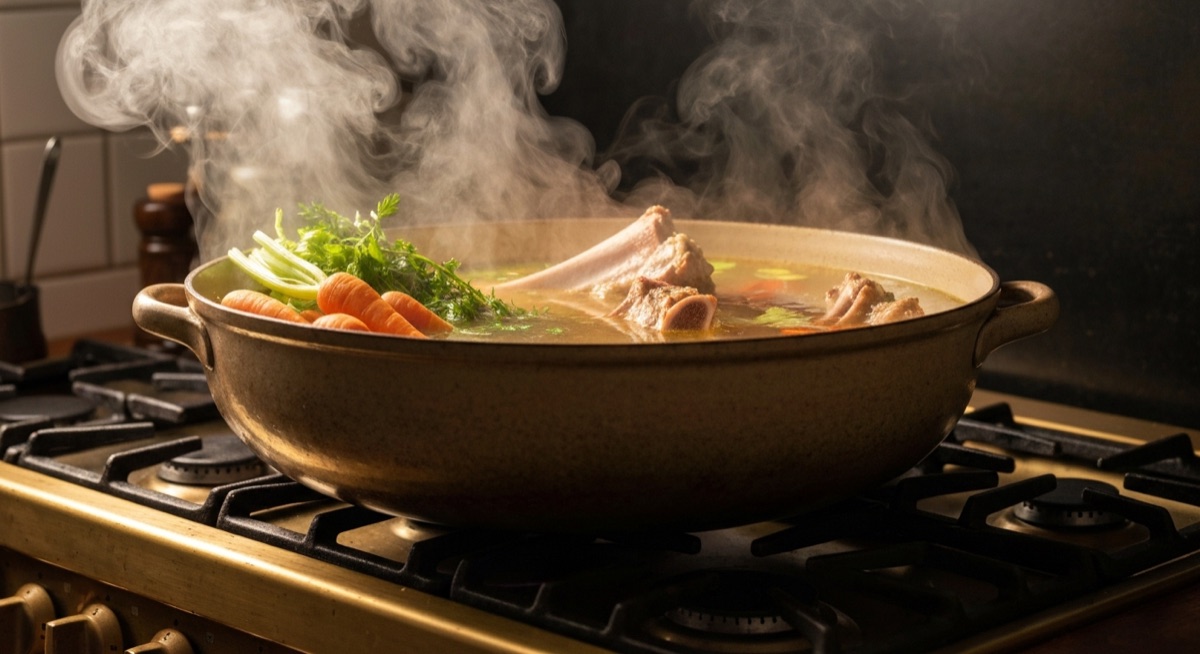
How to Make Bone Broth: The Complete Recipe and Method Guide
A step-by-step bone broth recipe with ratios, timing, and troubleshooting. Stovetop, slow cooker, and Instant Pot methods, plus how to get a gelatinous broth.
Homemade bone broth is more than just a culinary trend; it’s a foundational pillar of nourishing health, deeply rooted in traditional practices. For centuries, cultures around the world have utilized every part of an animal, transforming humble bones into a potent, nutrient-dense elixir. At rooted-glow.com, we champion approaches that support holistic well-being, and bone broth stands out as a prime example of accessible, impactful nutrition.
This comprehensive guide will walk you through everything you need to know to create your own gelatinous, flavorful, and incredibly beneficial bone broth right in your kitchen. From selecting the best bones to mastering various cooking methods and troubleshooting common issues, consider this your ultimate resource for unlocking the power of this ancient superfood.
Why Make Your Own Bone Broth?
While store-bought bone broth has become increasingly available, making your own offers a multitude of advantages that cannot be overstated. It’s not just about cost savings; it’s about control, quality, and maximizing the nutritional punch.
1. Cost-Effectiveness: Let’s face it, high-quality bone broth can be pricey. A small carton from the grocery store often costs upwards of $8-$10, and if you’re consuming it regularly for its health benefits, those costs quickly add up. When you make your own, you transform what would otherwise be discarded — animal bones, vegetable scraps — into a valuable product. You can often source bones very cheaply, or even for free, from local butchers, farmers, or by saving them after cooking meat. This makes homemade bone broth an incredibly economical way to boost your nutrient intake and support your health journey.
2. Complete Control Over Ingredients: When you purchase bone broth, you’re often at the mercy of the manufacturer’s ingredient list. This can mean added sodium, unwanted preservatives, natural flavors that aren’t truly natural, or even vegetable oils. Making your own broth gives you absolute control. You choose the quality of the bones (grass-fed, organic, pasture-raised), the freshness of the vegetables, and the purity of your water. This ensures your broth is free from any additives or ingredients you wish to avoid, aligning perfectly with a clean eating philosophy. This level of control is crucial for those with dietary sensitivities or specific health goals.
3. Superior Gelatin Quality and Nutrient Density: This is perhaps the most significant differentiator. The hallmark of a truly nutrient-rich bone broth is its gelatinous texture when chilled. This “gel” is a direct indicator of collagen extraction – the very protein responsible for many of bone broth’s heralded benefits, from supporting joint health to promoting glowing skin and fortifying the gut lining. Store-bought broths, particularly shelf-stable varieties, often lack this gelatinous quality. They may be made with less collagen-rich bones, shorter cooking times, or processed in ways that degrade the delicate collagen proteins.
Homemade broth, cooked low and slow for extended periods, maximizes the extraction of collagen, amino acids (like glycine, proline, and glutamine), minerals (calcium, magnesium, phosphorus), and other beneficial compounds. This superior extraction translates directly into a more potent, health-supporting elixir. For a deeper dive into these benefits, explore our article on [/bone-broth-benefits/]. The connection between bone broth, gut health, and collagen is profound, as detailed in [/bone-broth-gut-health-collagen-connection/].
4. Environmental and Ethical Considerations: Making your own bone broth is also a wonderful way to practice nose-to-tail eating and reduce food waste. By utilizing bones that might otherwise be discarded, you honor the animal and extract maximum value from its parts. This sustainable approach aligns with conscious living and mindful consumption.
In essence, making your own bone broth is an act of self-care, a commitment to quality nutrition, and a savvy financial decision. It empowers you to take charge of your health with a delicious, versatile, and deeply nourishing food.
Bones to Use: The Collagen-Rich Choices
The secret to a truly gelatinous and nutrient-dense bone broth lies in selecting the right bones. Not all bones are created equal when it comes to collagen content. To maximize the extraction of gelatin, amino acids, and minerals, focus on bones that are rich in cartilage, connective tissue, and marrow.
Ideal Bones for Bone Broth:
- Knuckle Bones (Joint Bones): These are perhaps the holy grail of bone broth bones. Knuckles are packed with cartilage and connective tissue, which are incredibly rich in collagen. As they simmer, this collagen breaks down into gelatin, giving your broth that coveted jiggle. Beef knuckles are excellent, but lamb or pork knuckles also work well.
- Marrow Bones: These are the long, cylindrical bones (like femurs or tibias) that contain a rich, fatty marrow. While marrow itself doesn’t contribute directly to gelatin, it adds incredible flavor, healthy fats, and a range of fat-soluble vitamins and minerals to your broth. A good balance of marrow bones and joint bones is ideal.
- Oxtail: Often overlooked, oxtail is a fantastic choice. It’s essentially a section of the tail, composed of bone, marrow, and a significant amount of connective tissue and meat. Oxtail contributes both deep flavor and abundant gelatin, making for a very rich and robust broth.
- Feet (Pork or Chicken): If you’re serious about gelatin, animal feet are your best friend. Chicken feet, in particular, are almost entirely cartilage, skin, and tiny bones, yielding an incredibly thick, gelatinous broth. Pork feet are similarly effective. Don’t be squeamish – they work wonders for broth consistency.
- Ribs and Neck Bones: These bones have a good amount of meat and connective tissue attached, contributing both flavor and some collagen. They are good additions to a mix of other bones.
- Backbones/Spinal Bones: Also good for both flavor and gelatin, especially from larger animals.
- Whole Carcasses (Chicken, Turkey): After roasting a chicken or turkey, don’t discard the carcass! It’s a treasure trove of bones, cartilage, and residual meat that will make an excellent broth. These are particularly good for a lighter, more delicate broth compared to beef.
Recommended Ratios for a Balanced Broth:
For a truly robust and gelatinous broth, aim for a mix of different bone types. A good general guideline is to prioritize bones rich in connective tissue and cartilage.
- Beef Broth:
- Ratio: Aim for 60-70% joint/knuckle bones, oxtail, or feet and 30-40% marrow bones, rib bones, or neck bones.
- Example: For 4-5 lbs of bones, use 3 lbs of beef knuckles and 2 lbs of marrow bones. Adding 1-2 lbs of oxtail or beef feet will dramatically increase gelatin.
- Chicken Broth:
- Ratio: Focus heavily on chicken feet (if available), backs, necks, and wing tips. A whole roasted chicken carcass is also excellent.
- Example: For a large pot, use 2-3 lbs of chicken feet, 2 lbs of chicken backs/necks, and one roasted chicken carcass.
- Pork Broth:
- Ratio: Similar to beef, prioritize pork hocks, trotters (feet), and neck bones for gelatin, with some spareribs or backbone for flavor.
- Example: 2-3 lbs of pork trotters, 2 lbs of pork neck bones.
Where to Source Your Bones:
- Local Butchers: Your best bet for high-quality bones. They often have knuckles, marrow bones, and oxtail readily available and are usually happy to sell them cheaply, or even give them away. Ask for grass-fed or pasture-raised bones for superior nutrition.
- Farmers Markets: Many local farms sell bones directly.
- Grocery Stores: Check the meat department; sometimes they have pre-packaged marrow or soup bones.
- After Roasting: Save the bones from any roasted chicken, turkey, or beef roasts. Freeze them until you have enough for a batch of broth.
Don’t be afraid to mix and match. A combination of different bone types will yield a more complex flavor profile and a richer nutrient density. The more cartilage and connective tissue, the gellier your broth will be!
The Master Recipe: Foundation for Any Method
This master recipe provides the core ingredients and ratios for a rich, flavorful, and gelatinous bone broth. You can adapt it slightly based on your preferred animal bones (beef, chicken, pork) and your flavor preferences.
Yields: Approximately 2-3 quarts (depending on reduction) Prep time: 20-30 minutes Cook time: Varies by method (see below)
Ingredients:
- Bones: 4-5 lbs (1.8-2.3 kg) of mixed bones (e.g., beef knuckles, marrow bones, oxtail for beef; chicken feet, backs, necks, carcass for chicken). See “Bones to Use” section for ideal ratios.
- Water: Enough to cover the bones by 1-2 inches (approx. 4-5 quarts / 4-5 liters).
- Apple Cider Vinegar (ACV): 2 tablespoons (30ml) – crucial for mineral extraction.
- Vegetables (optional, for flavor):
- 2-3 large carrots, roughly chopped
- 2-3 celery stalks, roughly chopped
- 1 large onion, quartered (skin on is fine, adds color)
- 1 head of garlic, cut in half horizontally
- Herbs & Spices (optional, for flavor):
- 1 tablespoon black peppercorns
- 2-3 bay leaves
- Fresh parsley stems (a handful)
- Fresh thyme sprigs (a few)
- Salt: To taste, added at the end.
The Role of Apple Cider Vinegar (ACV):
Apple cider vinegar plays a vital role in bone broth production, and it’s not just for flavor. The mild acidity of ACV helps to draw out the valuable minerals from the bones and connective tissues into the water. Think of it as a gentle solvent that aids in the extraction process, making your broth even more nutrient-dense. Don’t worry, the vinegar flavor largely dissipates during the long cooking process, leaving behind no noticeable sourness in the final broth. Always add it at the beginning of the cooking process.
Water Ratio:
The key is to cover the bones completely with water, but not to drown them. Aim for 1-2 inches (2.5-5 cm) of water above the bones. Too much water will dilute the broth, resulting in a less concentrated flavor and potentially less gelatin. Too little water, and your bones won’t be fully submerged for proper extraction. As the broth simmers, water will evaporate, concentrating the flavors and nutrients. You may need to top up the water periodically, especially with longer cooking times, to ensure bones remain submerged.
Three Methods Step-by-Step
No matter your kitchen setup, there’s a bone broth method for you. Each has its pros and cons regarding time, attention required, and resulting broth characteristics.
1. Stovetop Method (12-24 hours)
The traditional stovetop method yields a deeply flavorful broth and allows for easy monitoring. It requires an occasional check but offers great control over the simmering process.
Equipment: Large stockpot (8-12 quart / 7.5-11 liter capacity)
Instructions:
- Roast Bones (Optional but Recommended): For richer flavor and color, spread bones on a baking sheet and roast in a preheated oven at 400°F (200°C) for 30-40 minutes, until nicely browned. This step is especially beneficial for beef and pork bones. For chicken, you can use a roasted carcass or skip roasting if using raw bones.
- Add Bones to Pot: Transfer the roasted (or raw) bones to your large stockpot.
- Add ACV and Water: Pour in the 2 tablespoons of apple cider vinegar, then add enough cold water to cover the bones by 1-2 inches.
- Soak (Optional): Let the bones and ACV soak in the cold water for 20-30 minutes before heating. This further aids in mineral extraction.
- Bring to a Boil, Then Skim: Place the pot over high heat and bring it to a rolling boil. As it heats, foam and scum will rise to the surface. Use a large spoon or ladle to carefully skim off and discard this foam. This step is important for a clearer, cleaner-tasting broth.
- Reduce to a Simmer: Once skimmed, reduce the heat to the lowest setting possible. The goal is a gentle simmer – just a few bubbles breaking the surface, not a vigorous boil.
- Add Vegetables & Herbs: Add your chopped carrots, celery, onion, garlic, peppercorns, bay leaves, parsley stems, and thyme sprigs to the pot.
- Simmer for 12-24 Hours: Cover the pot partially (leaving a small gap for steam to escape) and let it simmer for the recommended duration. For chicken bones, 12-18 hours is usually sufficient. For beef or pork bones, 18-24 hours is ideal. The longer you simmer, the more nutrients and gelatin you’ll extract.
- Monitor Water Level: Periodically check the water level. If it drops significantly and bones are exposed, add more hot water to keep them submerged.
- Strain the Broth: Once simmering is complete, remove the pot from heat. Using tongs or a slotted spoon, carefully remove and discard all the large bones and vegetables.
- Fine Strain: Place a fine-mesh sieve or colander lined with cheesecloth over a large heat-proof bowl or another pot. Slowly pour the broth through the sieve to catch any remaining small particles or sediment.
- Cool and Store: Allow the strained broth to cool completely at room temperature before transferring it to airtight containers for storage.
2. Slow Cooker Method (24-48 hours)
The slow cooker is a set-it-and-forget-it dream for bone broth. It maintains a consistent low temperature, making it ideal for very long cooking times without much supervision.
Equipment: Large slow cooker (6-8 quart / 5.5-7.5 liter capacity)
Instructions:
- Roast Bones (Optional but Recommended): As with the stovetop, roast bones at 400°F (200°C) for 30-40 minutes for enhanced flavor.
- Add Bones to Slow Cooker: Place the roasted (or raw) bones into your slow cooker insert.
- Add ACV and Water: Pour in the 2 tablespoons of apple cider vinegar, then add enough cold water to cover the bones by 1-2 inches.
- Add Vegetables & Herbs: Add your chopped carrots, celery, onion, garlic, peppercorns, bay leaves, parsley stems, and thyme sprigs.
- Cook on Low for 24-48 Hours: Cover the slow cooker and set it to the “LOW” setting.
- Chicken Broth: Cook for 24-36 hours.
- Beef/Pork Broth: Cook for 36-48 hours. The slow cooker maintains a gentle simmer, so there’s usually no need to skim foam, though you can if desired after the first few hours.
- Monitor Water Level (Optional): Due to the sealed nature of most slow cookers, water evaporation is minimal. You typically won’t need to add water, but check occasionally if cooking for the full 48 hours.
- Strain the Broth: Once cooking is complete, turn off the slow cooker. Carefully remove and discard all the large bones and vegetables.
- Fine Strain: Place a fine-mesh sieve or colander lined with cheesecloth over a large heat-proof bowl or another pot. Slowly pour the broth through the sieve to catch any remaining small particles or sediment.
- Cool and Store: Allow the strained broth to cool completely at room temperature before transferring it to airtight containers for storage.
3. Instant Pot Method (3 hours)
For those short on time, the Instant Pot (or any electric pressure cooker) is a game-changer. It drastically reduces cooking time while still extracting a significant amount of gelatin and flavor due to the high-pressure environment.
Equipment: Instant Pot or electric pressure cooker (6-8 quart / 5.5-7.5 liter capacity)
Instructions:
- Roast Bones (Optional but Recommended): Roast bones at 400°F (200°C) for 30-40 minutes for enhanced flavor. This step is particularly important for Instant Pot broth to ensure a deep flavor, as the cooking time is shorter.
- Add Bones to Instant Pot: Place the roasted (or raw) bones into the Instant Pot insert.
- Add ACV and Water: Pour in the 2 tablespoons of apple cider vinegar. Add enough cold water to cover the bones, ensuring you do not exceed the “MAX FILL” line of your Instant Pot (this is crucial for safety). You might need to break larger bones to fit.
- Add Vegetables & Herbs: Add your chopped carrots, celery, onion, garlic, peppercorns, and bay leaves. (Parsley and thyme are often added after pressure cooking for fresher flavor in the IP method, but can be added now if preferred).
- Pressure Cook: Secure the lid and ensure the vent is sealed.
- Beef/Pork Broth: Set to “Manual” or “Pressure Cook” on HIGH for 120-180 minutes (2-3 hours).
- Chicken Broth: Set to “Manual” or “Pressure Cook” on HIGH for 90-120 minutes (1.5-2 hours).
- Natural Pressure Release: Once cooking is complete, allow the pressure to release naturally (NPR) for at least 30-45 minutes, or until the float valve drops completely. This slow release helps to further extract nutrients and prevent “blowout” if you were to quick-release a large pot of liquid.
- Strain the Broth: Once pressure is released, open the lid. Carefully remove and discard all the large bones and vegetables.
- Fine Strain: Place a fine-mesh sieve or colander lined with cheesecloth over a large heat-proof bowl or another pot. Slowly pour the broth through the sieve to catch any remaining small particles or sediment.
- Cool and Store: Allow the strained broth to cool completely at room temperature before transferring it to airtight containers for storage.
How to Get a Gelatinous Broth: The Collagen Extraction Science
The “gel” factor is the holy grail of homemade bone broth. When your chilled broth solidifies into a jiggly, jelly-like consistency, it signifies a successful extraction of collagen from the bones and connective tissues. This is not just a textural preference; it’s a direct indicator of the broth’s nutritional potency.
The Science of Collagen Extraction:
- Collagen: This is the most abundant protein in the animal kingdom, forming the structural framework of skin, bones, tendons, ligaments, and cartilage. It’s a complex, triple-helix protein structure.
- Heat and Time: When collagen-rich bones are simmered gently in water over an extended period (12-48 hours), the heat and time work together to break down these tough collagen fibers.
- Hydrolysis: This breakdown process is called hydrolysis. The long collagen protein chains unravel and dissolve into smaller, water-soluble proteins called gelatin.
- Gelatin’s Role: Gelatin is what gives bone broth its unique properties. When hot, it’s a liquid. But as it cools, the gelatin molecules link together, forming a semi-solid, colloidal gel. This is the “jiggle” you’re looking for!
- Amino Acids: Gelatin is particularly rich in specific amino acids like glycine, proline, and hydroxyproline, which are crucial for various bodily functions, including gut health, joint support, and skin elasticity.
Why Some Broths Don’t Gel (and How to Fix It):
If your broth remains liquid even after chilling, don’t despair! It’s still nutritious, but you might have missed a few key factors for maximum gelatin extraction.
- Insufficient Collagen-Rich Bones: This is the most common reason. If you primarily used lean meat bones, chicken breast bones, or mostly marrow bones without enough knuckle bones, oxtail, or feet, there simply wasn’t enough collagen to extract.
- Solution: Prioritize bones with lots of cartilage, joints, and connective tissue (knuckles, oxtail, chicken/pork feet). Aim for 60-70% of your bone weight from these sources.
- Too Much Water: Over-diluting your broth with too much water can prevent it from gelling, even if there’s plenty of collagen. The concentration of gelatin won’t be high enough.
- Solution: Use just enough water to cover the bones by 1-2 inches. If your broth doesn’t gel, you can reduce it further on the stovetop after straining to concentrate the gelatin.
- Not Enough Cooking Time: Collagen needs time to break down into gelatin. Short cooking times, especially for beef or pork, won’t allow for full extraction.
- Solution: Adhere to the recommended cooking times: 12-24 hours for stovetop, 24-48 hours for slow cooker, and 2-3 hours for Instant Pot (which achieves higher temperatures).
- Too High Heat (Vigorous Boil): While a gentle simmer is crucial, a rolling boil can actually damage the delicate proteins and lead to a cloudy, less flavorful broth, and potentially hinder gelatin formation.
- Solution: Maintain a very gentle simmer – just a few bubbles breaking the surface.
- Skipping Apple Cider Vinegar: While not strictly necessary for gelatin, ACV aids in mineral extraction, and some believe its acidity also helps break down connective tissue, contributing to better gelatin.
- Solution: Always add 2 tablespoons of ACV at the beginning of the cooking process.
Don’t Give Up! Even if your broth doesn’t gel, it’s still packed with nutrients and a fantastic base for soups and stews. Think of gelling as a bonus, a sign of peak performance. With practice and attention to bone selection and cooking technique, you’ll soon be making consistently gelatinous, gut-healing broth. For more on the benefits of collagen, you might be interested in comparing [/collagen-peptides-vs-bone-broth/].
Flavor and Seasoning Your Bone Broth
While the bones provide the foundational flavor, adding aromatics, herbs, and spices can elevate your bone broth from good to truly exceptional. This is where you can customize your broth to suit your palate and intended use.
Basic Aromatics (Always Recommended):
- Onions: Quartered, skin on or off. The skin adds a lovely golden color.
- Carrots: Roughly chopped. Adds a touch of sweetness and earthiness.
- Celery: Roughly chopped. Provides a subtle savory note.
- Garlic: Halved or smashed cloves. Adds depth and a pungent warmth.
Herbs for Freshness and Depth:
- Parsley: Stems are great for broth; save the leaves for garnishing. Adds a fresh, green note.
- Thyme: Fresh sprigs. Imparts an earthy, slightly floral aroma.
- Bay Leaves: Dried or fresh. A classic savory herb that adds complexity.
- Rosemary: Use sparingly, as it can be quite strong. Best with beef or lamb.
Spices for Warmth and Complexity:
- Black Peppercorns: Whole peppercorns add a mild, earthy spice without being overpowering.
- Star Anise: One or two pods can add a subtle, sweet, licorice-like note, especially good for beef broth.
- Juniper Berries: A few berries can add a piney, slightly citrusy flavor, excellent with game or beef.
- Coriander Seeds: Lightly toasted, they add a warm, citrusy, and slightly nutty flavor.
Tips for Flavoring:
- Roast Vegetables: Just like roasting bones, roasting your carrots, onions, and celery for 20-30 minutes before adding them to the pot can deepen their flavor and contribute to a richer broth.
- Add Later for Freshness: For the stovetop or slow cooker methods, you can add half of your vegetables and herbs in the last few hours of cooking. This prevents them from becoming completely mushy and ensures some fresher notes in the final broth. For the Instant Pot, you might want to add fresh herbs like parsley and thyme after the pressure cooking cycle during the natural release or just before straining.
- Salt at the End: Always add salt to your bone broth after it’s strained and cooled, or just before you use it. Broth reduces significantly, concentrating flavors, and you don’t want it to become overly salty. Plus, if you plan to use it as a base for other dishes, you can season those dishes appropriately without over-salting the broth itself. Use a good quality sea salt or Himalayan pink salt.
- Experiment: Don’t be afraid to experiment with different combinations. For a more Asian-inspired broth, consider adding ginger, shiitake mushrooms, or a splash of tamari at the end. For a spicy kick, add a few dried chilies.
Remember, the beauty of homemade broth is its versatility. You can keep it simple with just bones, water, and ACV for a neutral base, or you can build layers of flavor with a thoughtful selection of aromatics and herbs.
Storage and Freezing
Once you’ve put in the effort to make a nourishing batch of bone broth, proper storage is key to preserving its freshness and extending its shelf life.
Cooling Down Safely:
Rapid cooling is important to prevent bacterial growth.
- Initial Cooling: After straining, let the broth cool down at room temperature for no more than 1-2 hours. You can speed this up by placing the pot in an ice bath in your sink.
- Refrigerate: Once it’s cool enough to handle (no longer steaming hot), transfer it to containers and immediately place it in the refrigerator. Do not leave it out on the counter overnight.
Refrigeration:
- Containers: Use airtight glass jars (like Mason jars) or BPA-free plastic containers. Ensure there’s a little headspace if you’re filling them completely, as liquids expand slightly when chilled.
- Shelf Life: Properly stored homemade bone broth will last for 5-7 days in the refrigerator. You’ll notice a fat cap forms on top as it cools. This fat cap acts as a natural seal, further protecting the broth from spoilage. You can scrape it off before reheating, or leave it for added flavor and nutrients.
Freezing for Long-Term Storage:
Freezing is the best way to preserve bone broth for extended periods.
- Containers:
- Glass Jars: Leave at least 1-2 inches of headspace to prevent the jars from cracking as the liquid expands.
- Freezer-Safe Bags: Pour cooled broth into freezer-safe zip-top bags, lay them flat on a baking sheet until frozen, then store them upright to save space. This creates flat “broth sheets” that are easy to stack.
- Ice Cube Trays: For individual portions, freeze broth in ice cube trays. Once solid, transfer the broth cubes to a freezer-safe bag. These are perfect for adding to sauces, stir-fries, or for a quick warming drink.
- Silicone Molds: Large silicone molds (like Souper Cubes) are excellent for freezing broth in 1-cup or 2-cup portions.
- Shelf Life: Frozen bone broth will maintain its quality for up to 6 months. While it’s safe to consume beyond that, the flavor and nutrient profile may start to degrade.
- Thawing: Thaw frozen broth in the refrigerator overnight, or gently warm it directly from frozen in a pot on the stovetop over low heat.
Signs of Spoilage:
Always trust your senses. Discard any broth that:
- Has an off-smell (sour, yeasty, or unpleasant).
- Shows signs of mold (even tiny spots).
- Has a cloudy appearance after reheating (if it wasn’t cloudy initially).
- Tastes sour or “off.”
By following these storage guidelines, you can ensure a steady supply of your nutritious homemade bone broth, ready to support your health whenever you need it.
Troubleshooting Common Bone Broth Issues
Even with the best intentions, sometimes bone broth doesn’t turn out exactly as planned. Here are common issues and how to address them:
1. Cloudy Broth: A cloudy broth is primarily an aesthetic issue and doesn’t necessarily mean it’s “bad,” but it can indicate a few things:
- Vigorous Boil: Simmering at too high a temperature can emulsify fats and release small bone particles, leading to cloudiness.
- Solution: Maintain a very gentle simmer – just a few small bubbles breaking the surface.
- Not Skimming Scum: Failing to skim off the initial foam and impurities that rise to the surface can contribute to cloudiness.
- Solution: Skim thoroughly during the first hour of cooking.
- Disturbing the Pot: Stirring the broth too much or jostling the bones can release fine particles into the liquid.
- Solution: Avoid unnecessary stirring.
- Improper Straining: Not using a fine-mesh sieve or cheesecloth can leave small particles.
- Solution: Double-strain through cheesecloth for a clearer broth.
2. Broth Won’t Gel: This is the most common frustration, as it signifies less collagen extraction. (See “How to Get a Gelatinous Broth” section for a more detailed breakdown).
- Insufficient Collagen-Rich Bones: Not enough knuckles, feet, oxtail, etc.
- Solution: Use more cartilage-rich bones next time.
- Too Much Water: Dilutes the gelatin.
- Solution: Use less water, just enough to cover bones by 1-2 inches. You can also reduce your finished broth on the stovetop to concentrate it.
- Not Enough Cooking Time: Collagen needs time to break down.
- Solution: Extend cooking time.
- Too High Heat: Can damage delicate proteins.
- Solution: Maintain a gentle simmer.
3. Broth is Too Greasy: A thick layer of fat on top is normal, but sometimes the broth itself feels overly greasy.
- Too Many Fatty Bones: Using too many marrow bones without balancing with leaner bones.
- Solution: Balance your bone selection.
- Not Skimming Fat: While a fat cap is good for storage, you might prefer less fat in the broth itself.
- Solution: After the broth has chilled in the refrigerator, the fat will solidify on top. You can easily scrape off as much or as little of this fat cap as you desire before reheating.
4. Bland Broth: A broth lacking in flavor can be disappointing.
- Not Roasting Bones: Roasting bones caramelizes them, developing deep, rich flavors.
- Solution: Always roast beef and pork bones. For chicken, using a roasted carcass helps immensely.
- Insufficient Bones: Not enough bone-to-water ratio.
- Solution: Use the recommended 4-5 lbs of bones for a standard pot.
- Lack of Aromatics: Skipping vegetables, herbs, and spices.
- Solution: Add onions, carrots, celery, garlic, peppercorns, and bay leaves.
- Too Much Water: Dilutes the flavor.
- Solution: Use less water, or reduce the finished broth on the stovetop to concentrate flavors.
- Not Enough Salt: Salt is a flavor enhancer.
- Solution: Season generously with good quality salt after straining and to taste when reheating.
Troubleshooting is part of the learning process. Each batch of bone broth is an opportunity to refine your technique and create an even better, more nourishing elixir next time!
Related Reading
Frequently Asked Questions (FAQs)
Here are some of the most common questions people have when making bone broth:
1. Why didn’t my bone broth gel? This is the most frequently asked question! The primary reason is usually an insufficient amount of collagen-rich bones. You need bones with plenty of cartilage, connective tissue, and joints, such as beef knuckles, oxtail, chicken feet, or pork trotters. Other factors include using too much water (diluting the gelatin), not cooking it long enough for the collagen to break down, or cooking at too high a temperature which can degrade the proteins. Ensure you’re using 2 tablespoons of apple cider vinegar, which helps draw minerals and collagen from the bones. Don’t worry, even if it doesn’t gel, it’s still packed with nutrients and beneficial.
2. How long does homemade bone broth keep? Properly stored in an airtight container, homemade bone broth will last for 5-7 days in the refrigerator. The fat cap that forms on top acts as a natural seal, helping to preserve it. For longer storage, bone broth freezes beautifully for up to 6 months (and often longer, though quality may slowly decline after 6 months). Always cool your broth quickly before refrigerating or freezing to prevent bacterial growth.
3. Can I reuse bones for another batch of broth? While you technically can reuse bones, it’s generally not recommended for a second full batch. The majority of the collagen, minerals, and flavor compounds will have been extracted in the first, long cook. A second batch made with the same bones will be significantly weaker in flavor, nutrient density, and gelatin content. If you’re using a lot of meaty bones, you might get a very light “second wash,” but for a truly potent and beneficial broth, it’s best to start with fresh bones for each batch.
4. Should I roast bones first before making broth? Yes, absolutely! Roasting bones (especially beef, pork, and lamb bones) beforehand is a highly recommended step. Roasting caramelizes the bones and any residual meat, creating a deeper, richer, and more complex flavor profile for your broth. It also contributes to a beautiful golden-brown color. For chicken broth, using a roasted chicken carcass (after you’ve eaten the meat) is equivalent and highly effective. While you can make broth with raw bones, roasting makes a noticeable difference in flavor depth.
5. What’s the difference between chicken and beef bone broth in terms of benefits? Both chicken and beef bone broths are incredibly nourishing and share many similar benefits, largely due to their high collagen and amino acid content. They both support gut health, joint function, skin elasticity, and provide essential minerals. However, there can be subtle differences:
- Amino Acid Profile: While both are rich in glycine, proline, and glutamine, the exact ratios might vary slightly based on the animal and the specific bones used.
- Mineral Content: Beef bones tend to be denser and may offer a slightly broader spectrum or higher concentration of certain minerals like iron.
- Fat Content: Beef broth often has a higher fat content, which can be beneficial for those seeking healthy fats, but can also be easily skimmed if preferred.
- Flavor Profile: Chicken broth tends to be lighter and more delicate, making it versatile for many recipes. Beef broth is typically richer and more robust, perfect for heartier dishes.
Ultimately, the best bone broth is the one you enjoy and consume regularly! Both are excellent choices for supporting your health journey. For specific benefits related to gut health, explore [/gut-brain-axis-supplements-protocol/].
Making your own bone broth is a rewarding process that connects you to ancient wisdom and provides a powerful tool for enhancing your health. With this guide, you’re now equipped to create this golden elixir in your own kitchen, nourishing your body from the inside out and embracing the rooted-glow.com philosophy of holistic well-being.